文本是《WordPress Settings API 指南(共8篇)》专题的第 5 篇。阅读本文前,建议先阅读前面的文章:
到目前为止,我们已经近距离了解了 Settings API 的功能,我们甚至创建了一个主题来实践我们所学的知识。我们已经学习了 章节、字段、设置、菜单、页面等部分。
如果你从开头就学习到这里,你会发现,这些文章的篇幅都是比较长的,并且有很多代码。我们已经重点学习了 Settings API 的核心内容。在接下来的文章中,我们将更加简短、集中地讲解剩下的话题,这将减少文章的篇幅以及代码实例,希望能让大家更加容易消化每个知识点。
注:由于时间精力有限,本教程没办法翻译分享,希望朋友们可以加入我们,帮助我们进行翻译,有小酬谢,有意者请联系倡萌QQ 745722006(注明:教程翻译)。
At this point in the series, we’ve taken a close look at the Settings API and what it has to offer. We’ve even begun creating our own theme to help demonstrate everything we’ve been learning. We’ve covered sections, fields, settings, menus, pages, and more.
If you’ve been following along from the beginning, you’ve likely noticed that these articles are long and are code intensive. We’ve hit the major points of the Settings API so, for the remaining articles, we’re going to be taking a shorter, more focused approach on the rest of the topics. This will reduce the length of our articles and the amount of code we’re writing and hopefully make some of the ideas a bit easier to digest.
Last time, we left off in the middle of development: We’ve successfully created our own options page and introduced a few new options, but we left the project in a state that prevented all of our options from being properly saved. In this article, we’re going to take a look at why we’re unable to save our options and what we can do to fix it.
Before we get started: This article assumes that you’re familiar with the Settings API and theme options. If you’re a beginner or even intermediate WordPress developer, I highly recommend catching up on the rest of the series before diving into this post.
Why Won’t My Options Save?
If you’ve been following along through this series, your options page should look something like this:
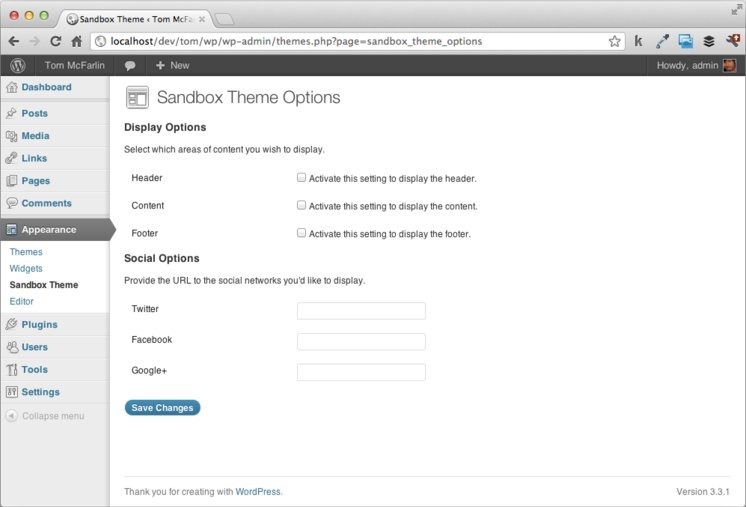
Everything looks good, but there’s a problem with this setup – the “Social Option” values will properly save but the “Display Options” will not. Before going any further, it’s important to understand why we’re able to render our options out on a single page, but we’re unable to save both options.
Recall that earlier in the series, we defined two sets of settings for our theme – “Display Options” and “Social Options”. By using the Settings API, we’re telling WordPress to create entries for each group of settings in the database. Since we’ve defined two groups of settings, then two rows are created in the database. Next, the Settings API renders the options out to the dashboard using form elements. From there, WordPress takes the form values and saves them to the database.
In order to provide a greater level of security, WordPress assigns each group of settings a unique value called a nonce that protects against malicious attacks. Since a nonce value is applied to each group of settings, we’re currently rendering out a single form with two nonces. When you submit the form to the server, WordPress will only see (and, thus, use) the “most recent” nonce value. In our case, that’s the “Social Options”. As such, only those options are serialized – the “Display Options” are completely ignored.
This isn’t terribly advanced – in fact, you can actually see the two nonce values for each of our sections when you view the source of the page. Here is the nonce for the “Display Options:”
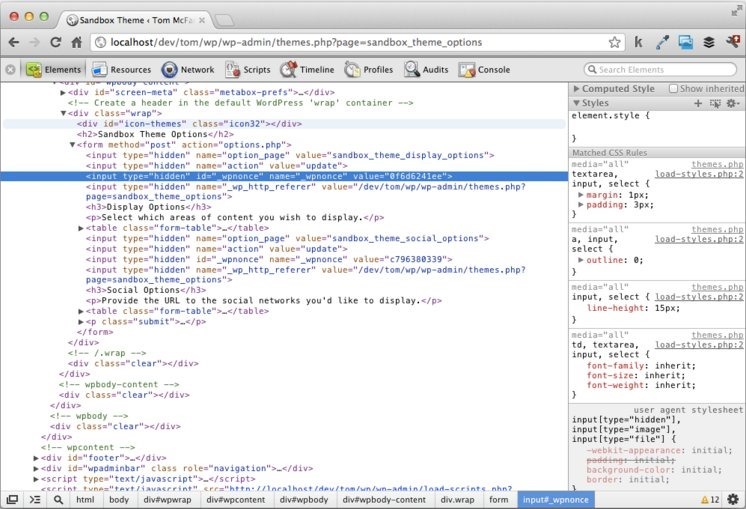
And here’s the nonce for the Social Options:
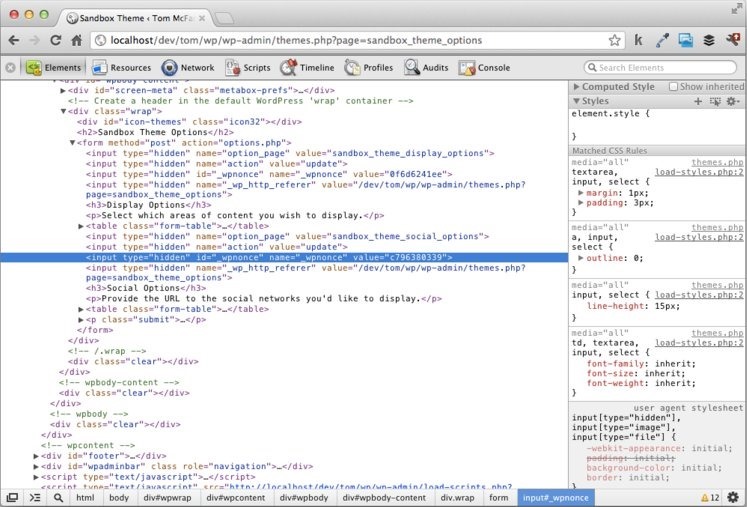
Your actual values will be different, but the input element will exist.
One way to prevent this problem from happening is to create a unique page for each group of settings. This isn’t a bad solution, but if you’re only working on a group of one or two options, creating an entire new page could be a bit overkill.
Luckily, WordPress supports middle-ground – you can still keep all of your settings on a single page, but ensure that users are able to save all of their settings and still have a pleasant user experience.
Enter Tabbed Navigation
You’ve no doubt seen tabbed navigation throughout the WordPress dashboard. Just take a look at the “Themes” page:
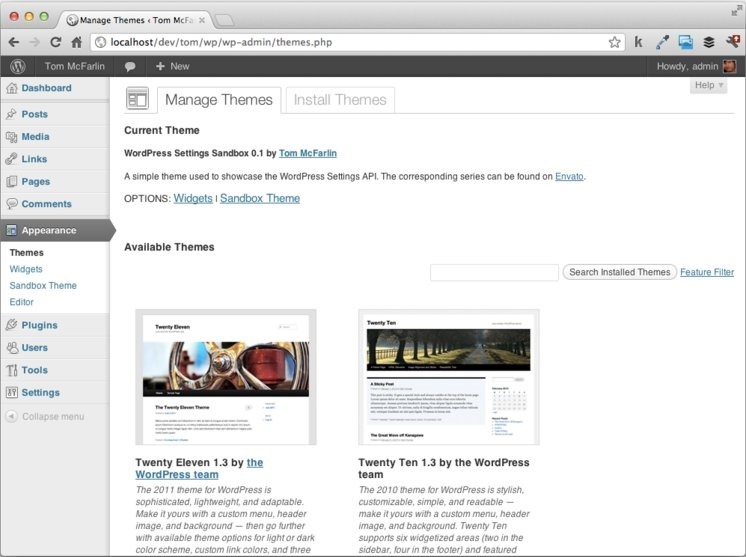
Tabbed Navigation provides a nice alternative for grouping sets of related options into a single page without sacrificing the overall user experience. This is what we’ll be implementing in the Sandbox Theme.
Before writing any code, it’s always a good practice to list out exactly what we’re going to do throughout development.
- Introduce two tabs – one for Display Options and one for Social Options
- Set the “Display Options” as the default tab when the page loads
- Make sure that the same tab is marked as active after saving a specific page of options
- Verify that the update message renders when settings are saved
Adding Individual Tabs
In functions.php, locate sandbox_theme_display. This is the function that we’re using to actually render the options page. As of now, it should look like this:
function sandbox_theme_display() {
?>
    <!-- Create a header in the default WordPress 'wrap' container -->
    <div class="wrap">

        <div id="icon-themes" class="icon32"></div>
        <h2>Sandbox Theme Options</h2>
        <?php settings_errors(); ?>

        <form method="post" action="options.php">

            <?php settings_fields( 'sandbox_theme_display_options' ); ?>
            <?php do_settings_sections( 'sandbox_theme_display_options' ); ?>

            <?php settings_fields( 'sandbox_theme_social_options' ); ?>
            <?php do_settings_sections( 'sandbox_theme_social_options' ); ?>

            <?php submit_button(); ?>

        </form>

    </div><!-- /.wrap -->
<?php
} // end sandbox_theme_display
First, let’s introduce our two tabs. This is relatively straightforward as we’re going to take advantage of CSS classes that WordPress already provides – namely, nav-tab-wrapper and nav-tab. In the sandbox_theme_displayfunction, drop the following block of HTML just below the call to settings_errors():
<h2 class="nav-tab-wrapper">
    <a href="#" class="nav-tab">Display Options</a>
    <a href="#" class="nav-tab">Social Options</a>
</h2>
Obviously, this is very basic but we’ve just introduced two styled tabs that we’ll be using throughout the rest of the tutorial. At this point, your code should look like this:
function sandbox_theme_display() {
?>
    <!-- Create a header in the default WordPress 'wrap' container -->
    <div class="wrap">

        <div id="icon-themes" class="icon32"></div>
        <h2>Sandbox Theme Options</h2>
        <?php settings_errors(); ?>

        <h2 class="nav-tab-wrapper">
            <a href="#" class="nav-tab">Display Options</a>
            <a href="#" class="nav-tab">Social Options</a>
        </h2>

        <form method="post" action="options.php">

            <?php settings_fields( 'sandbox_theme_display_options' ); ?>
            <?php do_settings_sections( 'sandbox_theme_display_options' ); ?>

            <?php settings_fields( 'sandbox_theme_social_options' ); ?>
            <?php do_settings_sections( 'sandbox_theme_social_options' ); ?>

            <?php submit_button(); ?>

        </form>

    </div><!-- /.wrap -->
<?php
} // end sandbox_theme_display
And your settings page should look like this:
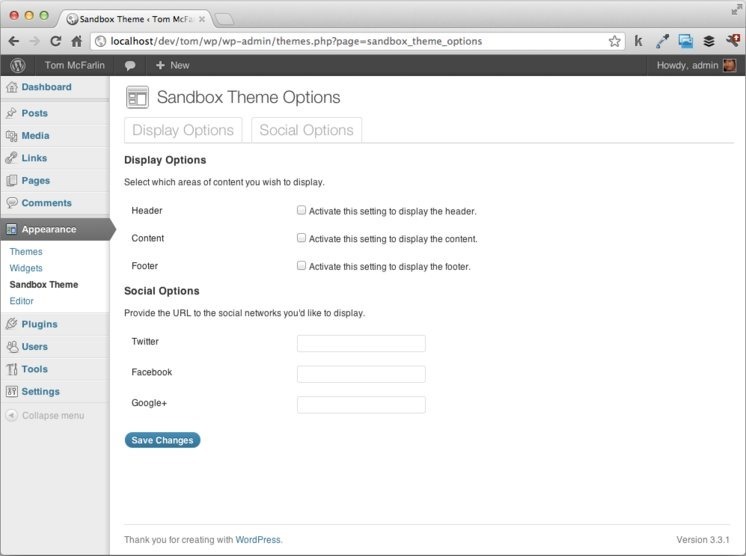
Bringing the Tabs to Life
In order to begin toggling our options pages, we’re going to need to provide some type of signal or flag for which options we want to render. This can be done using a query string variable that identifies which tab was clicked and that can, in turn, be read using PHP.
So let’s ago ahead and give each anchor that we created above a unique flag that signals what tab we’re trying to load. Update your markup to look like this:
<h2 class="nav-tab-wrapper">
    <a href="?page=sandbox_theme_options&tab=display_options" class="nav-tab">Display Options</a>
    <a href="?page=sandbox_theme_options&tab=social_options" class="nav-tab">Social Options</a>
</h2>
Pay close attention here so not to miss this: We’ve provided two query string variables in each link – the page value and the tab value. The page value is necessary because it’s generated by WordPress via the Settings API and is used to tell the application which options page to load. The second value is an arbitrary value that we’ve used to signal which tab we’re on. Permitting you’ve done this correctly, notice that your browser’s address bar should reflect the values as you click on each tab.
Next, we need to write a little bit of PHP that reads the new query string value. Ultimately, this code is what will allow us to toggle our options page, but we’re going to take this a step at a time. So, let’s begin by writing a conditional to check to see if the query string value is set and, if so, store it in a variable. This can go directly above our nav-tab-wrapper that we’ve defined above.
<?php
if( isset( $_GET[ 'tab' ] ) ) {
    $active_tab = $_GET[ 'tab' ];
} // end if
?>
WordPress provides a class named nav-tab-active that we can apply to our anchor tabs to style them as active. As such, our next step will be to compare the value of the $active_tab variable to the tab query string variable and then apply that class name to the relevant tab.
To do this, update your code to look like this:
<h2 class="nav-tab-wrapper">
    <a href="?page=sandbox_theme_options&tab=display_options" class="nav-tab <?php echo $active_tab == 'display_options' ? 'nav-tab-active' : ''; ?>">Display Options</a>
    <a href="?page=sandbox_theme_options&tab=social_options" class="nav-tab <?php echo $active_tab == 'social_options' ? 'nav-tab-active' : ''; ?>">Social Options</a>
</h2>
Here, notice that we’ve written some inline PHP in the class attribute of each anchor. Essentially, the code says “If the active tab variable’s value is ‘display_options’, then echo the nav-tab-active keyword; otherwise, don’t echo anything”. Easy enough, right? Test it out a few times – you should see each of your tabs toggling back and forth.
At this point, your function should look like this:
function sandbox_theme_display() {
?>
    <!-- Create a header in the default WordPress 'wrap' container -->
    <div class="wrap">

        <div id="icon-themes" class="icon32"></div>
        <h2>Sandbox Theme Options</h2>
        <?php settings_errors(); ?>

        <?php
            if( isset( $_GET[ 'tab' ] ) ) {
                $active_tab = $_GET[ 'tab' ];
            } // end if
        ?>

        <h2 class="nav-tab-wrapper">
            <a href="?page=sandbox_theme_options&tab=display_options" class="nav-tab <?php echo $active_tab == 'display_options' ? 'nav-tab-active' : ''; ?>">Display Options</a>
            <a href="?page=sandbox_theme_options&tab=social_options" class="nav-tab <?php echo $active_tab == 'social_options' ? 'nav-tab-active' : ''; ?>">Social Options</a>
        </h2>

        <form method="post" action="options.php">

            <?php settings_fields( 'sandbox_theme_display_options' ); ?>
            <?php do_settings_sections( 'sandbox_theme_display_options' ); ?>

            <?php settings_fields( 'sandbox_theme_social_options' ); ?>
            <?php do_settings_sections( 'sandbox_theme_social_options' ); ?>

            <?php submit_button(); ?>

        </form>

    </div><!-- /.wrap -->
<?php
} // end sandbox_theme_display
But wait – there’s a subtle bug in this code! Recall that when a user lands on the settings page the first time, there’s no value for tab in the query string. As such, we need to set one as the default. To do this, let’s update the conditional that checks for the presence of the query string variable. While we’re at it, let’s consolidate it using the ternary operator:
$active_tab = isset( $_GET[ 'tab' ] ) ? $_GET[ 'tab' ] : 'display_options';
This says “if the query string contains a value for ‘tab’, assign it to the active tab variable; otherwise, assign the value of ‘display_options.'” This is exactly how we set the display tab as active. Once again, try out your tabs.
Toggling Our Settings Page
We’re almost done! The last thing that we need to do is to toggle our settings page based on which tab is active. Specifically, we only want to show the display options when the display tab is selected (and the same for our social options).
Since we have everything stored in the active_tab variable, we should be able to wrap our Settings API calls in a conditional and be good to go. So, first, locate the following block of code in your theme:
<form method="post" action="options.php">

    <?php settings_fields( 'sandbox_theme_display_options' ); ?>
    <?php do_settings_sections( 'sandbox_theme_display_options' ); ?>

    <?php settings_fields( 'sandbox_theme_social_options' ); ?>
    <?php do_settings_sections( 'sandbox_theme_social_options' ); ?>

    <?php submit_button(); ?>

</form>
Notice that we have two calls to settings_fields and do_settings_section. Basically, we only want to render a single group out when a particular tab is selected. To do this, we simply write a conditional that checks the value of $active_tab and then runs the appropriate section:
<form method="post" action="options.php">
    <?php

        if( $active_tab == 'display_options' ) {
            settings_fields( 'sandbox_theme_display_options' );
            do_settings_sections( 'sandbox_theme_display_options' );
        } else {
            settings_fields( 'sandbox_theme_social_options' );
            do_settings_sections( 'sandbox_theme_social_options' );
        } // end if/else

        submit_button();

    ?>
</form>
Refresh your options page – permitting you’ve done everything correctly, each group of settings should toggle based on the field and all of your options should properly save.
Conclusion
Tabbed Navigation is an easy way to group related options together and give your users a solid user experience by not inundating them with options. It’s relatively easy to implement and goes a long way to tightly integrating your options with the native WordPress look and feel.
In the next post, we’ll build on this even further by exposing a top-level menu that will make your theme options accessible via the menu along the side of the WordPress dashboard.
您已阅读完《WordPress Settings API 指南(共8篇)》专题的第 5 篇。请继续阅读该专题下面的文章:


